
Shoes by Robert
A Pair of Black-and-Whites
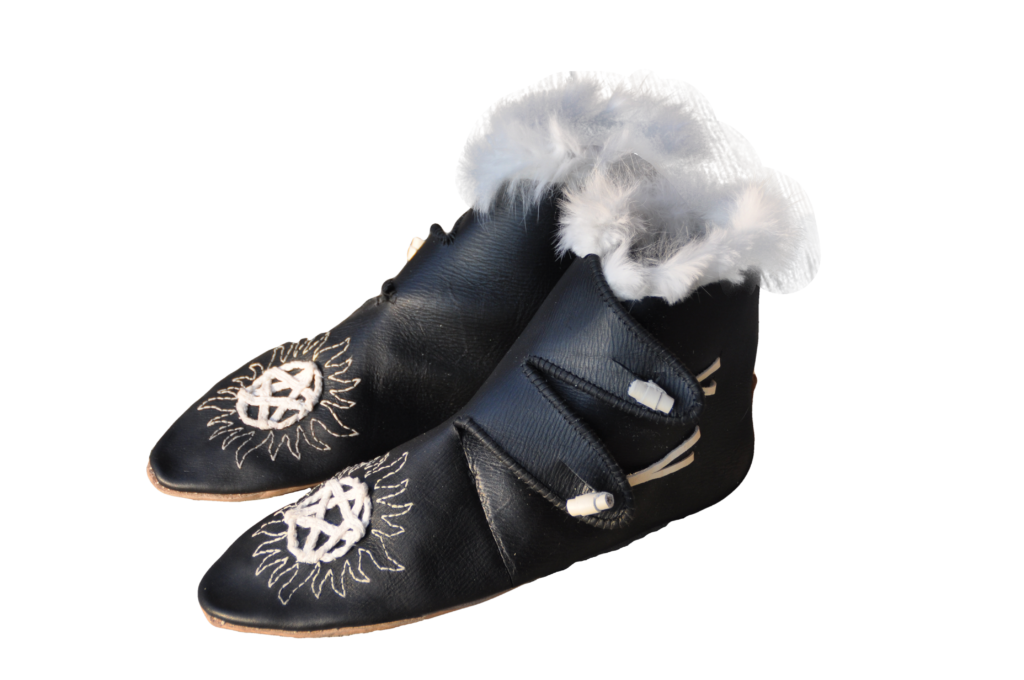
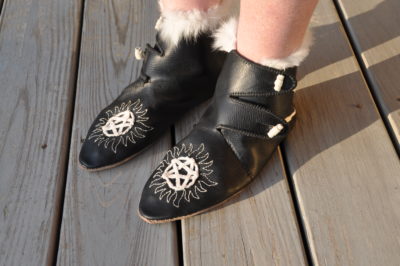
Our local group's Minister of Arts & Sciences, Elska, requested a pair of Viking Age shoes for her Laurel elevation ceremony. Specifically, she chose a type found in 10th-century Dorstadt, Netherlands.
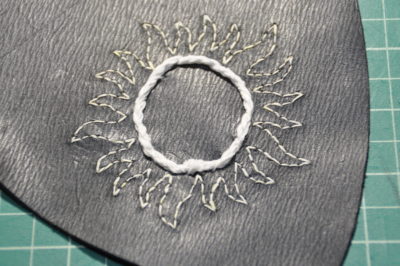
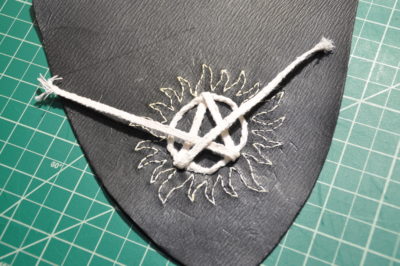
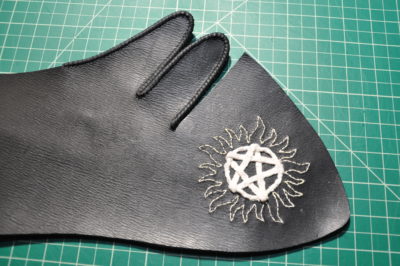
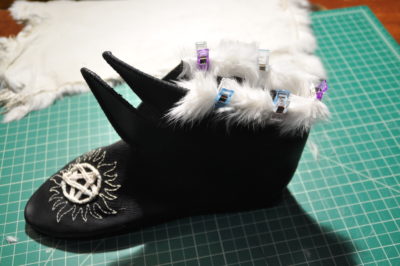
Having made a few of this type already, although with only one closing flap instead of the two in her exemplar, I decided to put that experience to use, but additionally decorate this pair by adding her heraldic badge to the vamp.
![]()
More Firsts
As seems to be the trend with the last few pairs of shoes, this project also offered a number of "firsts" for me:
- leather embroidery
- finger weaving
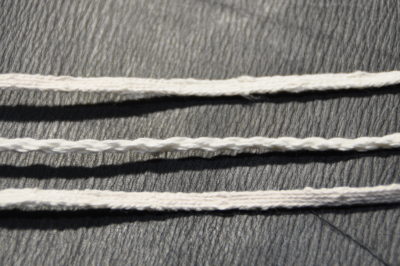
- card weaving
- use of fur
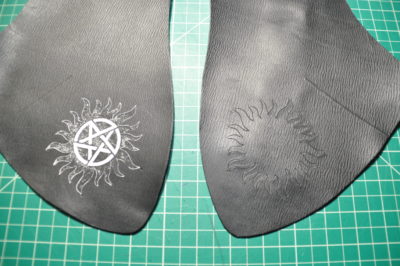
Numerous surviving shoes sport embroidery and many more have traces of its use inferred from needlework patterns in the leather. Some have heraldic motifs. To my knowledge, however, no Viking Age shoes display heraldic designs.
In part, my decision to incorporate finger- and card-weaving aspects arose from the fact that such elements would allow these shoes to count toward a special five-categories-in-one object for the SCA event known as "Ice Dragon," which hosts at large arts-and-sciences competition, in which they would be entered. (The five categories: leatherworking; accessories; needlework; fiber arts; heraldic display.)
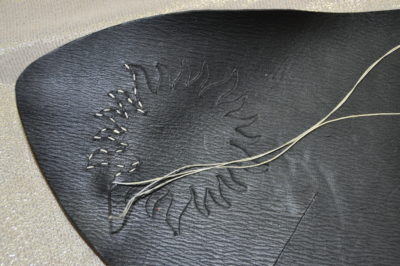
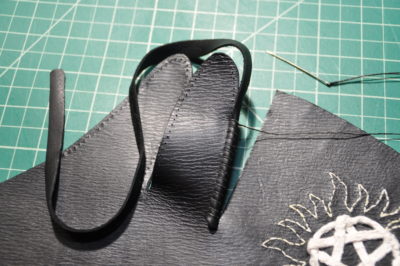
In particular, I used a finger-woven band for the circle in the device because it could be curved into a circle. I used a card-woven band for the star because it could interweave with itself as well as the circular band. (I've never tried finger weaving or card weaving prior to this project and both aspects are as simple as possible: one color, no patterns.) I tack stitched both bands to the leather and hoped they'd stay in place when turning the shoe.
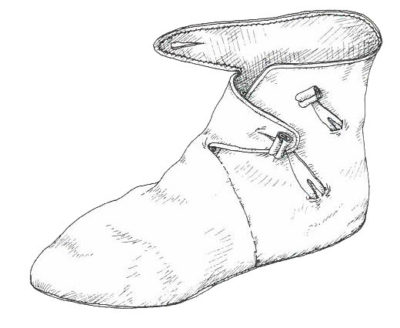
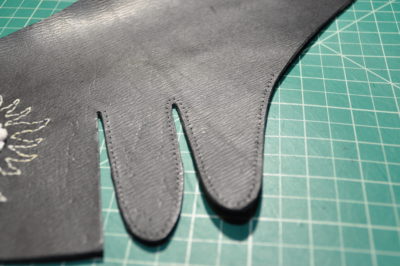
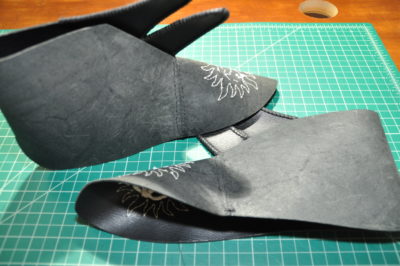
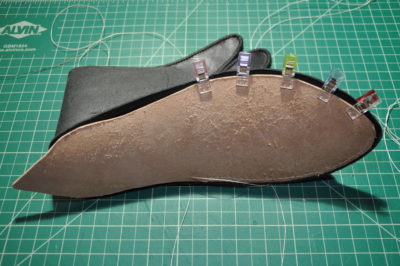
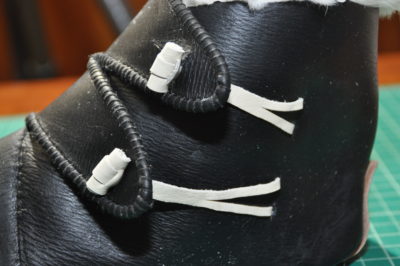
The basic process used for this project follows my typical work flow: make a duct-tape foot mold; create a prototype on canvas; adjust and go to leather; add vamp decoration and band for closing flaps; stitch side seams; stitch sole to upper; turn; add fur trim; make and add toggles. The basic steps are detailed elsewhere on this site.
I chose white rabbit fur for the opening trim because of the overall black-and-white palette; snowshoe hares were likely available at the time; and Elska raises rabbits on her homestead.
Challenges and Lessons Learned:
First, I was not at all certain that the attached woven components would look good when applied, or possibly interfere during the turning of the shoe. Although I’m pleased with the result, I suspect that the decoration could be made less bulky and more elegant by using fewer strands in the weaving. Instead of 8 for the finger weaving, I’d like to try 6 or perhaps 4. As for the 16 strands (4 cards), perhaps 12 (3 cards) would suffice.
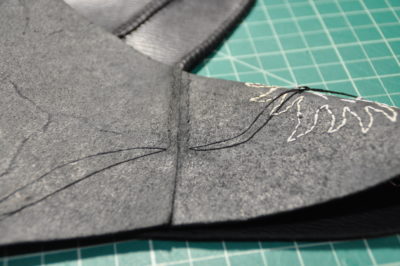
Second, working with bunny fur proved more… interesting than anticipated. Cutting the skin into strips resulted in a cloud of fibers floating around and landing all over the place. (Perhaps working with it damp would have been better.) Stitching it into place proved challenging because I could not see the white thread against the white skin and fur. I used a large running stitch to attach it, and no doubt it’s uneven in every regard.
Third, the black linen thread breaking during turning was not anticipated. The white thread also broke during stitching a couple of times, and prohibited me from pulling the stitches as tight as I wished when attaching the upper and sole together. I don’t know whether the fault lies with my particular linen, or all linen. I need to learn more about thread weights, fiber length, plies, etc.
Fourth, the vegetable-tanned leather does not behave the same way as others I’ve used: after turning, during drying, it pulled away from its seems a bit. Further, it was found to leak dye a little, despite not doing so in pre-construction testing. Therefore the white decoration may darken if the vamp gets wet.
See the original Ice Dragon documentation (PDF) for more details on the original archaeological finds, samples of period embroidery, and materials used in the project.


Last updated April 18, 2018.