
Shoes by Robert
For Viking Archers
Back in December it seemed like a good idea to make a pair of shoes as a prize for an archery competition. Thus, as one of the items in the prize pool for the top 10 placements, I offered a bespoke pair for the archer who chose them for their reward.
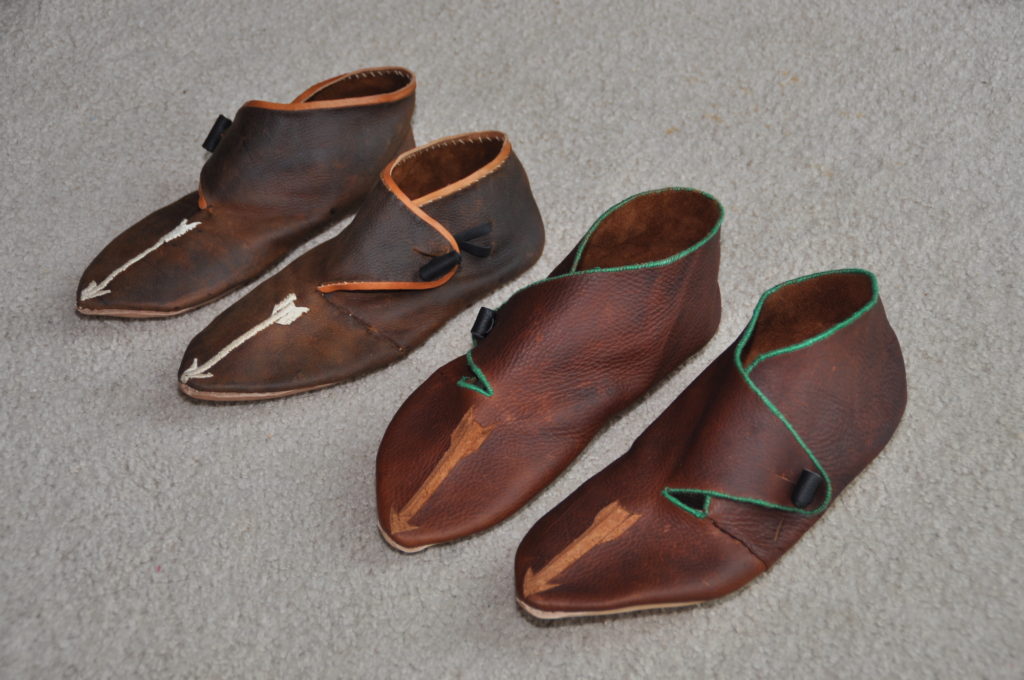
On the day of the tournament, I molded the feet of the archer who chose the shoe prize, but put aside making them for a few weeks because of the holidays and other projects in the queue at the time. The archer desired something from the Viking Age so I decided to make a pair in one of my earlier patterns, with a stitched-on topband as well as a vamp sporting an embroidered arrow as a way to mark the occasion.
I eventually finished the shoes and delivered them in mid-February, but they turned out to be way too small. I'm still not sure why my usual pattern-making process failed so completely in this case. At this point my project queue had refilled, and I lacked time to work on a second pair for a while.
After several weeks I returned to the archer-shoes project and made another pair, modifying the pattern and being able to ensure they fit in person before getting too far along with decorating them. At this point I had decided to try embroidering them after turning them, rather than before, but I made the arrow design too large to embroider (the design was too wide to push a needle through).
After thinking about options, I decided to scrape away the arrow design's top layer, in the manner used on my earlier poulaines, to save the work that had been done while at the same time keeping the archery theme on the shoes. That seems to have come out okay, and I added a very tightly whip-stitched topband of green linen thread for color and decoration, because the veg-tanned band did not work with the oil-tanned leather in the first pair.
So... multiple failures on this project. Adding the veg-tanned topband to the first pair and then turning them did not work well at all. The topband tends to flop over and its stitches are readily visible. I suspect this is because the topband would not pull tightly enough against the oil-tanned uppers. Adding it after turned, as on the earlier pair might have worked, but it might be that the two kinds of leather simply don't play well together.
The original pattern did not fit at all. It's not clear why. Perhaps I simply did not follow the mold well enough and traced it incorrectly. The main lesson learned is to compare the circumference of the sole to the length of the upper that will be attached to it. They need to be more or less the same. This should be done at the paperboard step, before cutting any leather.
As for the design, it's still not known whether embroidery must be done flat, or can be done after the shoe is constructed and turned. It definitely requires good lighting and care when putting the design onto the leather and then cutting the incisions. They have to be close enough to facilitate a needle pulling thread to go between them within the thickness of the leather.
Last updated June 16, 2019.