Shoes by Robert
Patterning
Making a pattern for use in cutting leather can be accomplished in various ways. No one knows how medieval shoe makers created their patterns, but it seems likely they used parts of their bodies, such as finger lengths or hand spans, to take measurements and translated these to shapes on leather.
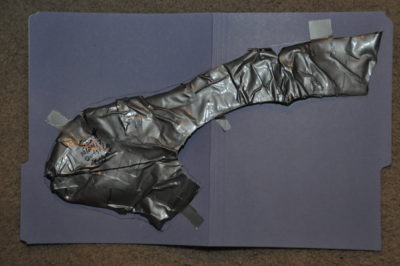
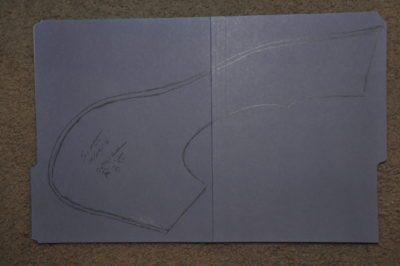
Today we have other methods. The one I currently prefer involves molding with duct tape to create foot-shaped shell that can be flattened and traced. This method is not perfect, but it has worked well for me across a number of people to form shoes that fit them well.
Translate to Leather
Once you have the light cardboard versions of your pattern, you're ready to try making a 3-D shoe out of them. If done accurately, it will be the same size as the foot it represents.
- Before cutting any leather, I like to trace the pattern onto canvas, which I then form into the shape of the intended shoe, and compare it against the sole for fit, and overall look. You might find that your ankle opening isn't even all the way around, or other aspects you want to adjust. The important thing here is to use non-deforming material for the mock-up. Leather does stretch, but it's not good to stretch the leather while you're building a shoe with it. Repeat this step if necessary to achieve the lines and shape you want. If you're new to shoe-making, take your time and get a good mock-up.
- Orient your leather. Generally you want the length of the shoe running the same direction as the length of the hide, for minimal stretching along the length of the shoe. You do want some stretch in the shoe from side-to-side / up-and-down. The hide stretches opposite its length, because that's the dimension the animal used for breathing, so its skin accomodated that by being stretchable.
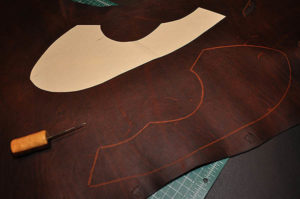
- Once I'm happy with the look and fit, I trace the (possibly modified) pattern onto the grain (smooth) side of the leather with a scratch awl. This leaves a nice line for cutting.
- Cut out the pattern with a very sharp knife or scissors. I've found either work fine for uppers, but only a knife for the thick sole.
- Now, if you're brave, immediately flip the pattern over and repeat for the other foot. This will ensure you get the proper side for each foot, although at the potential cost of wasted leather if you find the pattern does not work out as hoped. If you prefer to build the first shoe before starting the second, be very sure that you flip the pattern later.
- You should now have an upper or two. Next is stitching.
On making a pattern of a Roman shoe, but applicable to medieval as well:
Taking a pattern from a few fragments of worn and distorted archaeological leather finds in order to make a completely new pair of shoes is not a matter of simply copying the shapes and hoping the shoe will turn out right. A shoe is a three dimensional object yet the pattern has to be two-dimensional in order to be cut from the leather. When a shoe is made, flat leather is forced into a three-dimensional shape. After a shoe has been worn, the leather has formed to the wearer’s foot. When a shoe is thrown away and buried in a rubbish tip, further distortions and material loss takes place. Roughly two thousand years later, when the shoe’s fragments come to light during an archaeological excavation, it is often re-interpreted as a flat object in a registration drawing. The drawing is the best solution for preserving the information contained in the fragment, but it is not a cutting pattern for making a shoe. The cutting pattern has to be rediscovered by reducing the distortions and finding the original elegance of the design lines. Superficial wear marks and material loss on the archaeological leather fragments are often a hindrance rather than a help for reconstructing the original pattern (Volken, 2008: 360).
Last updated August 19, 2019.