
Shoes by Robert
Royal Commission II
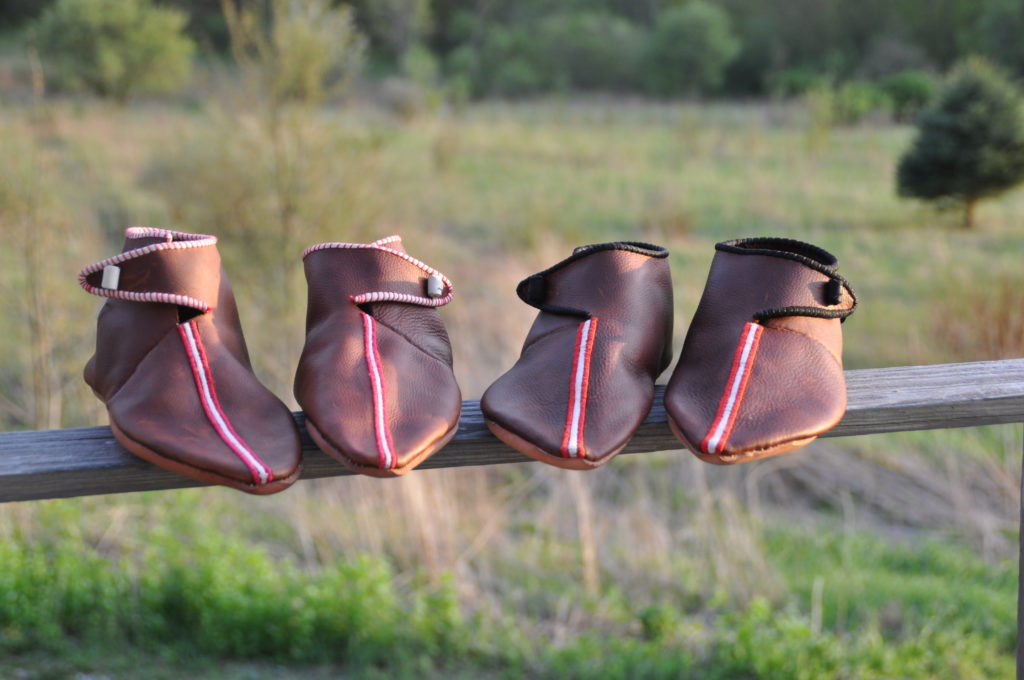
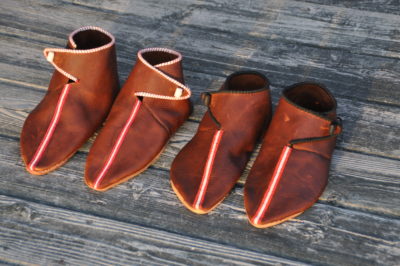
Having been invited to participate a second time in a team effort, in this case to provide garb for Their Majesties Sven Gunnarsson and Siobhán inghean uí Liatháin, I decided to go with the Viking Age pattern I've used in the past, but this time decorate it in period style embroidery with three strips of color up the vamp from toe to instep.
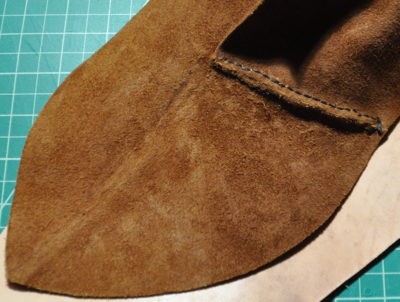
Shoes made during the 6th-9th centuries used one piece of leather to form the soles and uppers, resulting in one seam running up the vamp from toe to instep and another on the heel. The vamp seam, at least, became decorative (might as well make an ugly join look nicer). When shoemakers changed to using separate uppers and soles, the vamp seam became vestigial but its decoration stayed fashionable.
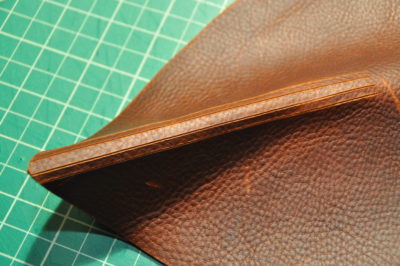
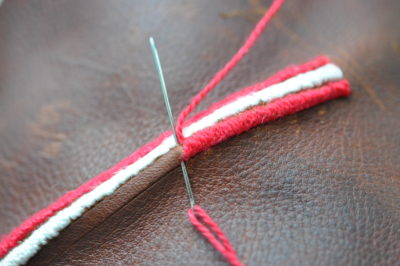
When researching the project, I learned that the embroidery did not simply loop through the leather, but instead looped through the thickness of the leather! It seems likely that this not only kept the leather strong, but also avoids puncturing it hundreds of times with tiny holes that would allow water to enter from the top from rain.
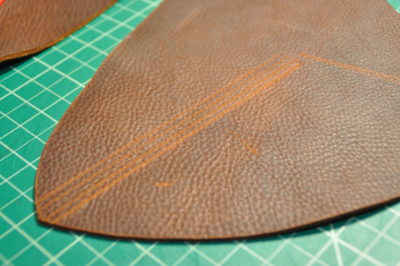
The embroidery thread is not simply put through in loops, but follows shallow incisions. These facilitate the stitching when working on a gently rounder surface, such as one's knee, where they can be opened for easier visibility and access to the needle, showing the thickness of the leather through which the needle is guided.
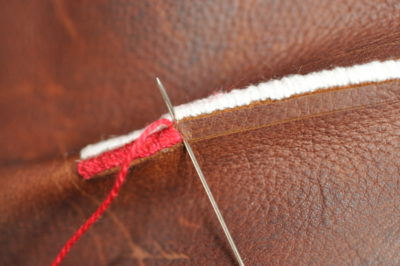
For thread, I used cotton. One pair has 6-strand straight cotton floss thread, the other has size 5 pearl cotton twisted thread. Period shoe decorators used silk, but that is significantly more expensive and beyond my budget for this project. I used a simple satin stitch, which is documented but not the only one known. I used glovers needles for both pairs, a size #7 with the floss and mostly pushed by hand, and a size #5 with the pearl thread and pushed with small pliers. Both methods proved hard on the left fingers and right elbow well before completing the total of some 2,500 stitches for all 12 bands in the four shoes. Next time I shall try a thimble ring and push the needle toward me instead of pushing it away.
By the end of the run, both kinds of embroidery thread were becoming fuzzy after they had passed through their holes more than 150 times. It will be interesting to compare how silk thread behaves in this regard. I could have used more separate pieces of thread to prevent that, but at the cost of more overhead to deal with the ends.
In all cases, I made the white strip first, working from throat to toe (thus left to right); then the right white strip (as seen from the wearer's viewpoint) in the same direction, and then the left white strip after turning the shoe 180 degrees, so running from throat to vamp, but right to left in this case. According to Larsen, not all embroidery ran in the same direction even on the same shoe. The strips run right down to the point and tuck under into the seam between the sole and the upper, a period practice according to Larsen, which means that the embroidery took place before the shoes were built and turned.
To compare my stitching with some from the period, I counted stitching in one run, finding I made approximately 215 loops along a 7-inch strip, or about 30.7 stitches per inch. This compares to 10 stitches per 2 cm, or 12.7 per inch, in a shoe referenced by Pedersen. Thus, my stitches are more than twice as dense, which I only learned after completing the project. However, it may be possible that the single quoted measurement was not embroidered, but had holes for attaching decoration (the thread has not survived). Or perhaps the embroidery thread was much thicker.
It took me at least one hour per embroidery strip. Working with the leather on the knee in front of a glass door resulted in more even sides on the strips than working flat on a table with overhead lights. Good lighting and a rounded surface to help open the incisions through which the tread passes are both essential for best results.
My main resource for the embroidery is the appendix "Technical Analysis of the Embroidery" in Larsen, by I. R. Pedersen, where numerous details and photos provide information about stitch count, types of stitches, designs, etc. of extant archaeological specimens.
About 50% of northern European turnshoes have been found decorated with silk embroidery in various colors, at least in some contexts, with anything from a single stripe down the front to elaborate sets of runes that spell out phrases from Virgil’s Latin texts.
References:
Goubitz, O., et al., 2007. Stepping Through Time: Archaeological Footwear from Prehistoric Times until 1800. SPA Uitgevers, pp. 147-149.
Larsen, A., 1992. Footwear from the Gullskoen Area of Bryggen: The Bryggen Papers: Main Series, vol. 4. Scandinavian University Press.
Volken, M., 2014. Archaeological Footwear: Development of Shoe Patterns and Styles from Prehistory til the 1600’s. SPA Uitgevers, pp. 125-127, 373.

Last updated April 11, 2019.