
Shoes by Robert
Tools and Materials
- Leather
My choice for uppers is 4-5 oz. This seems to me to be a good weight / thickness and happened to be what I had on hand from making a coat of plates (Tandy Kodiak side). It's thick enough to allow stitching an upper's seams together by passing a needle / boar's bristle through one side and out the thickness, then into the thickness and up out on the same side. (See elsewhere for a diagram of this common stitch.) My first nine pairs of shoes were made out of black leather, the 10th was brown.
For soles I use vegetable-tanned 9-10 oz. leather, because it's as thick as can be turned (so I've been informed but have not yet confirmed).
After making a number of pairs with Tandy's Kodiak hides, I have branched out to trying 4-5 oz. veg-tanned for the uppers with EcoFlow dye, as well as some much thinner leather. I have not yet tried what others consider to be better quality leather from places such as Wickett & Craig or Hermann Oak and it may not make sense to do so for shoes, especially the soles.
- Needles / Boar Bristles
Although it takes some practice to learn how to make waxed ends, they provide a great deal of flexibility (literally) when stitching uppers. See videos for helpful instructions on how to make waxed ends. The time spent learning it is worth it. You can buy bristles on eBay. If you cannot acquire boar's bristles or get the hang of making them, or just need a sturdier holder for your thread, you can use metal needles. I prefer #004, also available on eBay. When using these, I pull them with a small pair of pliers. Sometimes they break so twist and pull gently but firmly. They can also bend, which may or may not help in various stitching situations.
- Awl
You'll be needing to poke holes in leather in order to connect pieces together. I use one purchased on Amazon (as part of a 3-piece set; I use only the dark-brown one): it's extremely sharp, and not a scratch awl. I do use the latter to trace a pattern onto leather. I prefer to stick to known period tools, so do not use an awl with a curved blade, nor one with an eye that holds thread. If your awl is round-handled, I recommend you sand or shave it to produce at least one flat side to prevent it rolling around and possibly dropping off a table point-first into your leg or foot.
- Thread
Pure linen is, of course, a suitable material to use for most period footwear, but it needs to be strong enough for its purpose. Initially I tried cheap stuff on a big spool from Lithuania, but it broke far too easily - I could break it just by pulling on it. Since then I have tried bookbinding thread, which is far stronger, but significantly more expensive.
This comes in different sizes, and I've been experiment with it. Not understanding the gauge of the thread, I purchased 35/3. That's much stronger, but I can still break it when pulling seams tight. I have now moved to 12/3 and will update this page after using it. The gauge indicates thread thickness and number of strands, so 12/3 is three times as heavy as 35/3, and both have three plies.
Modern, synthetic thread can also be used, although pre-waxed may not work with boar bristles. The modern material I use can be found on Amazon.
- Resources:
- Punches and Stamps, Mallet
Many medieval shoes have openwork and/or impressed designs. To make some of these, I bought several stamps and punches of various size, shape, and design. They can be found on eBay, Etsy, Amazon, and leatherworking supply company sites and stores. I use a small round punch for making holes for ties and toggle ends. A mallet is used to make the punches punch and the stamps, er, stamp.
- Knives / Scissors, Straight Edge
You'll need these for cutting out soles and uppers as well as thread. The sharper, the better, when it comes to knives for leather. I find that a dull knife works well for drawing out linen thread into filaments for attachment to boar bristles when making waxed ends. I use a metal straight edge to cut topband leather and to measure and make knife cuts for toggle openings and slits from the opening. Relatively new to my kit is a round knife, which is getting close to period, and it's certainly making cutting easier. This particular one seems to be a good compromise of cost vs. quality.
- Coad / Wax
In order to make waxed ends, you'll want to use coad, which is a combination beeswax, pitch, and possibly other ingredients. The idea is to make a somewhat sticky combination of string and bristle; pure beeswax is too slippery. You will want regular beeswax for most of the linen thread so that it slides through holes. Many shoe makers have their own preferred coad recipe. Before making my own, I found some "bowyer's wax" on eBay that seemed like it might work and it has served its purpose. Recently, however, I've used a simple recipe of 1/3 part resin to 2/3 part beeswax, melted together on a double boiler, then dropped into a pot of cool water and hand-pressed into golf-ball sized pieces. So far, so good, but not much experience using it yet.
- Mannequin feet / socks
For my 10th project, with openwork on the uppers, I decided to buy a pair of plastic feet via eBay, and some low-cut yellow socks from Amazon. The idea is to put the socks on the feet and then insert them into the shoes, in order to show off the openwork design to best effect. Such feet might also be helpful in holding the shoes in their proper shape while drying after turning them. A wooden last might be even better, but that is a project for another day.
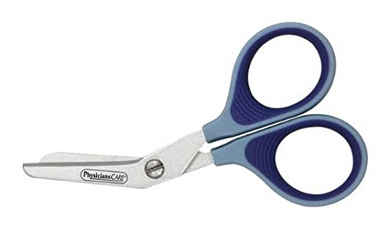
- Duct tape / light cardboard / pencil / Sharpie / bandage scissors
For making patterns, I use duct tape to cover a person's foot, which is in an unwanted sock. I have the person stand on the light cardboard and trace their foot holding a pencil perpendicular to the floor. The duct tape is then applied all around the foot, top to bottom and end to end, in a couple of layers. I use a Sharpie to trace the sole around the bottom of the foot with the marker sliding on the ground. I also mark the center line from big toe tip to frontmost intersection with the opening. And I trace where the ankle cut and side seam will be. Finally, using scissors, I carefully cut away the sock, along the side seam, just enough to get the foot out. Later I cut off the sole and snip a few cuts into the toes in order to allow the duct tape to be flattened. Then I trace that onto light cardboard, adding 1/4" of seam allowance to the upper (none to the sole).
Bandage scissors, like this $4-pair, work great for cutting away the taped sock while preventing an unscheduled blood donation from the foot.
- Quilter's Clamps
At first I used safety pins to hold the upper to the sole as it was stiched in place, but then an instructor teaching a workshop on glove making put me onto quilter's clamps: small, plastic, strong clamps. I highly recomment them because they are far easier to apply and remove and adjust. They can be obtained from some sewing stores and Amazon.
- Cutting Mat
This seemed like a luxury to me at first, but now it's essential: no worry about cutting a dining room table, nor putting in effort to find or replace other surfaces like wood, thick leather, or cardboard. They come in a variety of sizes and can be found on Amazon and crafting stores.
- Light
Essential for working at night, I use a cheap utility light with its own clamping mechanism, which itself is clamped to a long clamp that holds it upright to my work table. But use what works for you so that you can make and see your awl holes and your fingers!
- Stuff I Don't Use
Circular or pronged marking tools; sinew; curved needles; curved awl blade; stitching awl. I'm not sure any of these are period; sinew might be, but I've read that at least the artificial stuff is not great for shoes. The real stuff might be appropriate for some places and times. I suppose a curved awl blade and curved needle are period-plausible, but I haven't found them to be necessary so far. A pronged marking tool for stitch placement might be period-plausible too, but I find that it's not particular difficult to make a decently even stitch freehand.
See also discussion and references for period tools and materials by Marc Carlson for more information.
Last updated Sept. 29, 2020.